

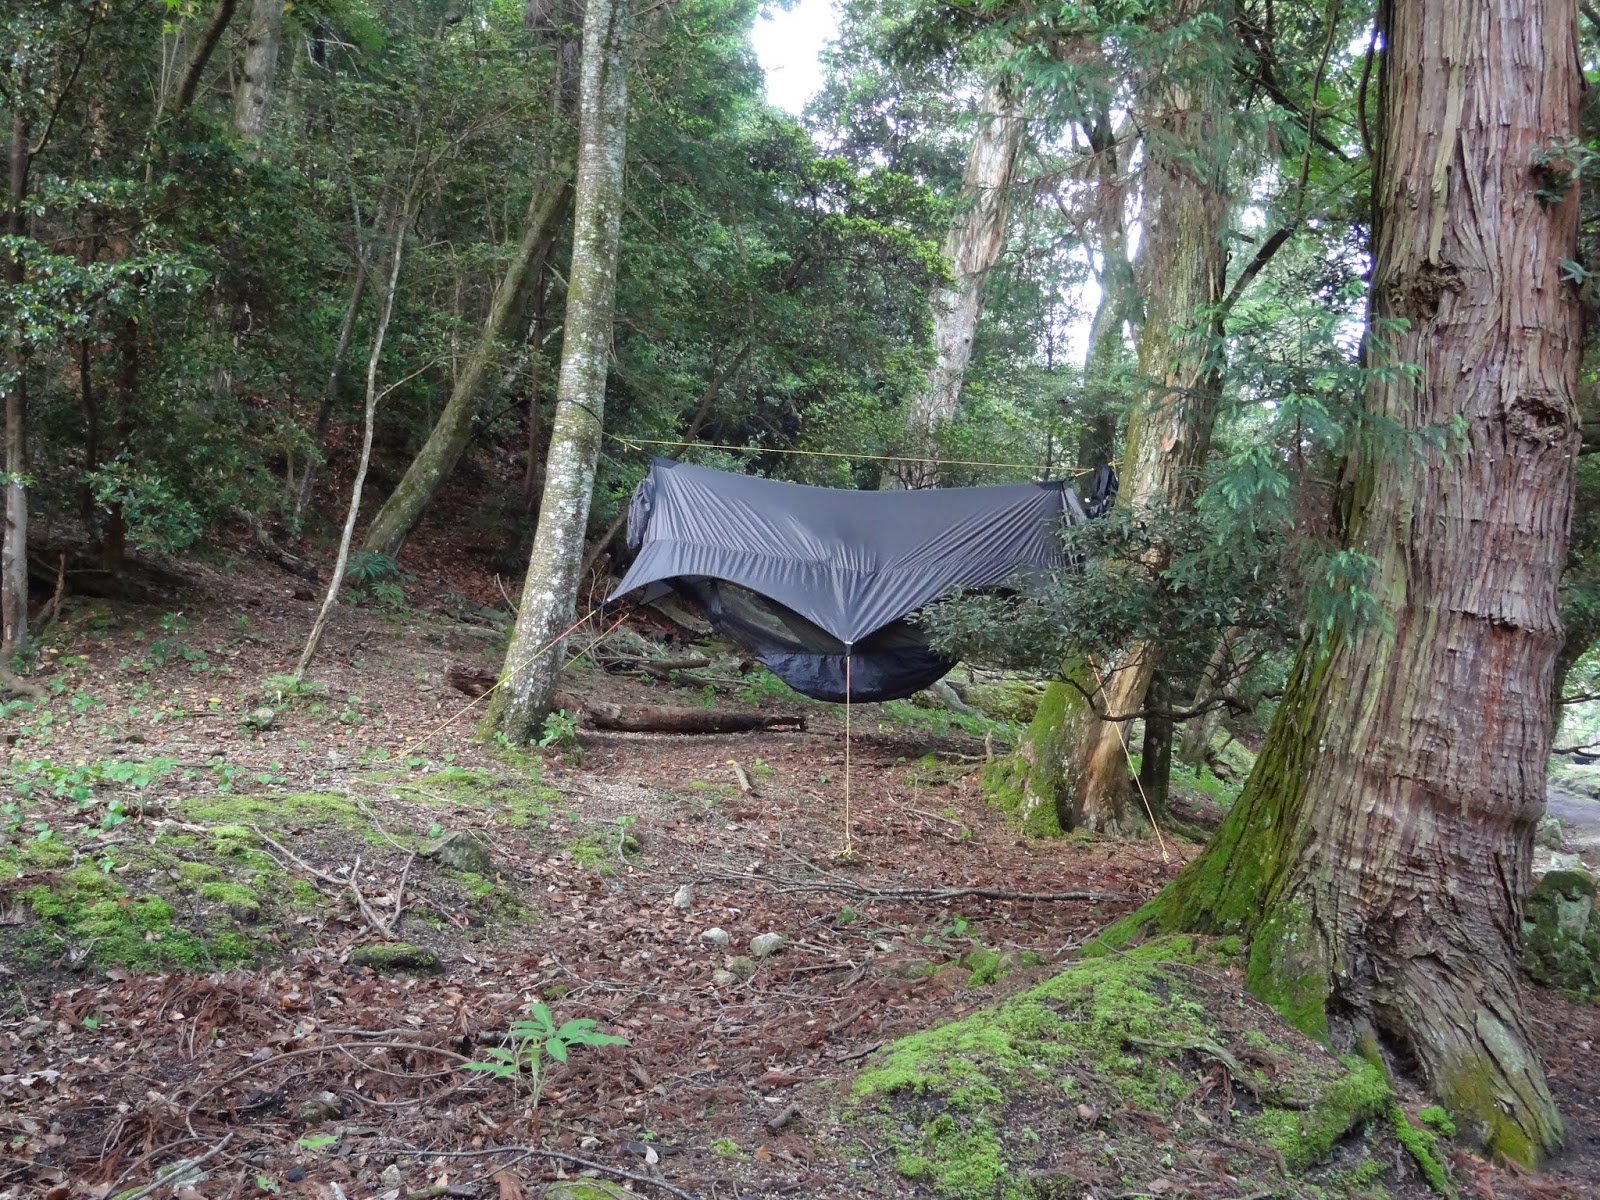
We found that the Nubé and Hambunk set-up created and sold by Sierra Madre Search was the system that was easiest to manage with the most protection wrapped into a nice well thought out package. Here is how we found it easiest to hang.
Details on how to urban camp are further detailed in Urban Camping: Cheap and Easy Travel in Japan.
-
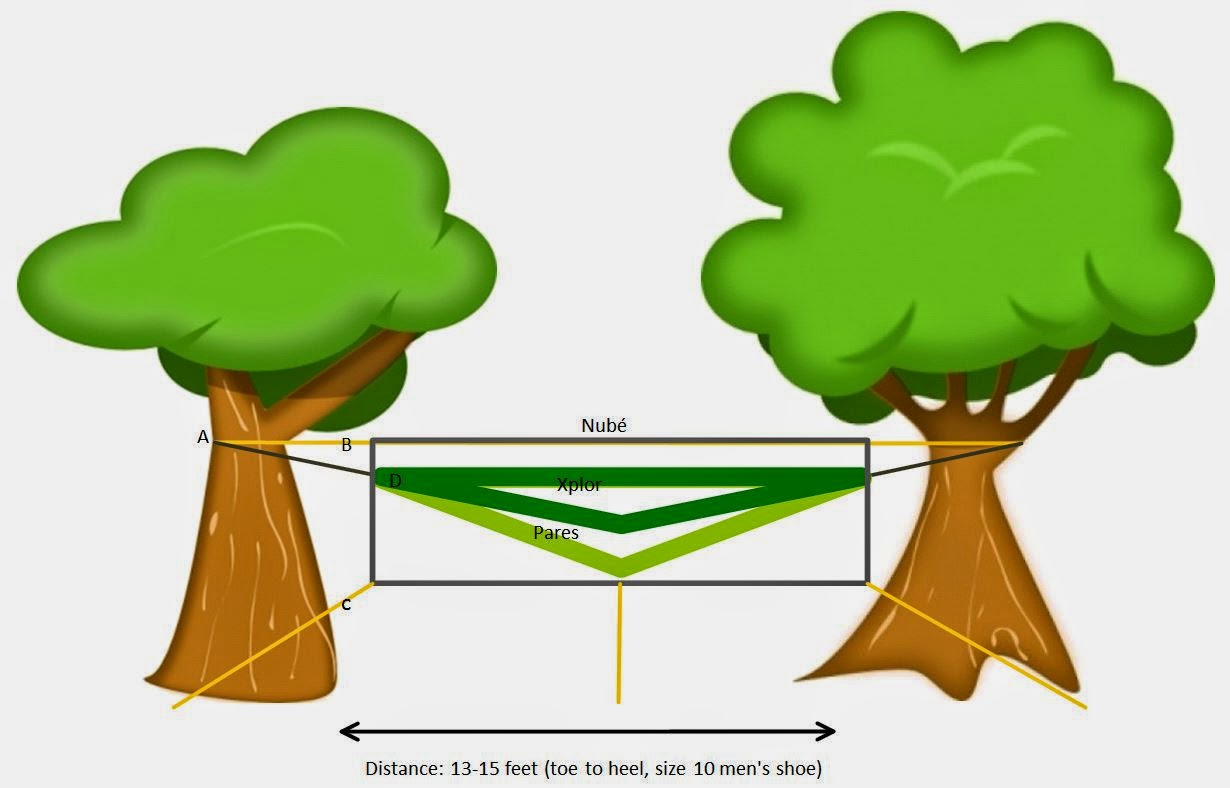
A: Hang both the Nubé tie and the hammock’s e-z Slings from the same point, as high up the tree as you can reach
- This way there is enough room to hang both hammocks and the bottom luggage compartment, if you don’t hang them both at the highest point, the luggage will be to low to the ground to use or the Pares sleeper will be sitting on top of the luggage…neither of those options is convenient
- Sometimes this is not possible due to smaller trees or too many limbs and then we worked around the luggage being stored below by clipping the backpack onto the carabiner at the foot end and then tightened the waist and chest straps tightly on the hammock and all was dry.
- Photos of where we hung and some of the adventures along the way can be found:
- Week 1: Tokyo, Yokohama, Hakone, & Kyoto
- Week 2: Nara, Himeji, Banshu Ako, Osaka, Hiroshima, Beppu, & Sakurajima
- Week 3: Sakurajima, Kagoshima, Yakushima, & Toyota
- Week 4: Toyota, Osaka, Ikeda, Takeda, Shirahama, Kii-Tanabe, & Kumano Kodo Pilgrimage
- Week 5: Kumano Kodo, Katsuura, Nachi, Nagoya, Yamaguchi, Akiyoshidai, Asa, Matsue, Kanazawa, & Wajima
- Week 6: Wajima, Senmaida, Niigata, Matsumoto, Hagurosan, Akita & Sapporo
- Week 7: Sapporo, Wakkanai, Okayama, & Tokyo
-
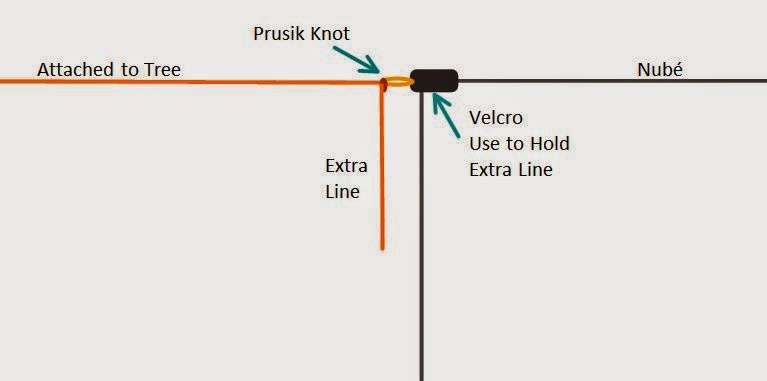
B: Nubé Ridge-line Adjustment:
- Attach one Nube line around the tree as high as you or the tallest person can reach.
- Adjust the Prusik Knot to try and center the Nube a little if needed.
- Attach the other end
- Slide the Prusik Knots until the Nube is centered as much as possible
- Lines should be taught
- Hint: Color coordinate the two ridge line ends so that you can pre-plan which way the Nube will zip-open. This is a lot easier then trying to take out the entire Nube and check or re-hanging
-
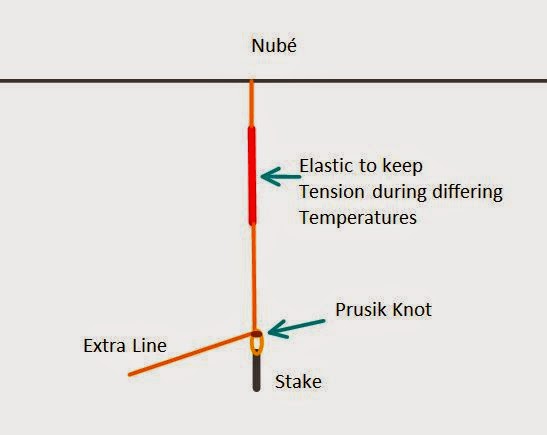
C: Nubé guy-line adjustment:
- We recommend tethering out the two center guy-lines, one on each side
- This allows for the Nube to sit centered and also provides for less skewing of the shape
- Then tether out each end of the Nube
- With the no-knot system attached we were able to adjust the Prusik Knots to easily change the angle, reach, and tightness of the guy-lines.
- We recommend tethering out the two center guy-lines, one on each side
-
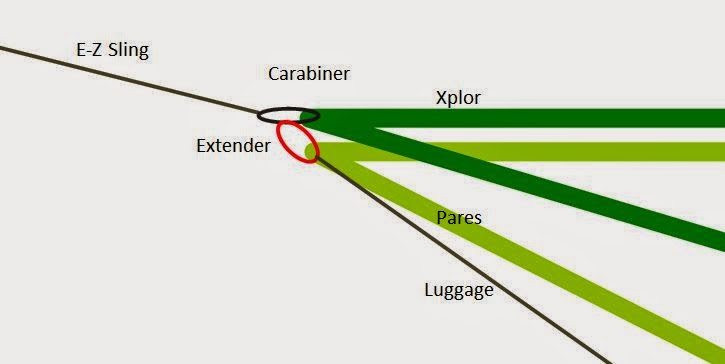
D: Hammock attachment hints (How to sleep in ham-bunks comfortably):
- Hang the Xplor first, this will basically provide a ridge-line for the Pares (larger hammock)
- Once you have each hung an e-z sling, take one for the Xplor carabiners and attach it to a loop that appears to be a high enough point that you can then hang the hammock level with the other e-z sling point.
- Now, this is the toughest part (especially when you are exhausted, it may take two of you and in many cases it did for us) STRETCH the Xplor as tight as you can possible get is so that when it hangs it is perfectly flat.
- Hint: Have a couple extra loops of rope that can act as adjusters to create more options for hanging distances; our loops of Amsteel Blue 7/64 were about 6″ in diameter when flattened and can be folded in half to allow for more versatility. Or if you’re willing you could put more knots in the easy sling for a tight hang.
- Hanging the Pares (larger hammock)
- Attach one end of the hammock directly to the Xplor’s Carabiner
- Unpack the rest of the hammock and halving one of the extenders (you may want to use the full length) attach the other end of the hammock to the second carabiner
- You should now see about 2 to 2 1/2 feet between the bottom of the Xplor and the Pares
- Luggage Compartment
- Finally attach the luggage lines to the Xplor Carabiners
- Feel free to adjust by tying new knots or using extenders
- Make sure that when the netting is down that there is some tension in the luggage line, otherwise when a person gets into the Pares, the bug netting will be pulled tighter then it should be, putting un-due stress on the fabric.
- Disclaimer: To hang the hammocks just-so took some trial and error on our parts, but as we had 40+ days to figure it out and we were properly incentivized with quality of sleep hanging in the balance we found the perfect set-up for us (mind you, this hang was perfect for us, it may not be the perfect hang for you).
- Hang the Xplor first, this will basically provide a ridge-line for the Pares (larger hammock)
-
How to make more room in the Xplor:
- I (Ash) was the one that slept in the Xplor, my backpack was the REI Lookout 40L, which I would place up in my hammock. Once in my hammock and inside my sleeping bag I would place the backpack under my knees, this way my knees were bent up (more comfortable for me) and the Xplor was widened out so that I would have more adjustment room.
- Since coming back, both Val and I have exchanged our normal beds for hammocks, I have placed two pillows and a queen-sized down blanket in exchange for the REI backpack to facilitate the same effect.
- Another tip would be to sleep opposite of each other so that the Xplor sleeper’s head will be at the toes of the Pares sleeper and vice-versa. This helps when handing items back and forth and when the Pares sleeper starts packing things up… she only knocks about my legs and such while stuffing her sleeping bag into a stuff sack. And is very helpful when zipping up the netting for a bug free sleep!